Tutorials - Week 5
illustrator and Vector Objects:
Launch illustrator and Create a New File
- Locate and/or Bring up the following Panels:
- Layers, Properties
- Pathfinder
- Color, Swatches
Make a Circle - Fill with Yellow and Stroke with Black
Make a Square - Fill with Red and Stroke with Blue
Use the Move tool to select and move each shape
Move the Square on top of the Circle so that they overlap
Use the cmd [ cmd ] key strokes to Bring the selected object Foreward or Backward
this is also referred to as "Arrange" and can be accessed by right-clicking
Bring the Square Foreward and move to the side of the Ciricle
With Object Selected, use the Transform Scale tool to change the size. Also experiment with the Rotate Tool.
Locate in the Layers Panel how to turn off visiblity on the object.
With the Square sized smaller than the Circle, Experiment with the Pathfinder options.
You also might want to select both, Copy/Paste to have a fresh copy to experiment with.
After you have worked with the Pathfinder, Choose a combination that you like and cmd G to Group them together so that they work as a Unit. Your Layers will show that you have Grouped.
The Move Tool will Select the Group, but the Direct Select Tool will select each separate object.
You can also Select multiple objects by dragging across them.
Experiment with the following Tools:
Paint Brush
Shaper Tool
Create an Icon for Exercise #3
You can work on many ideas on your artboard, but when you have something that you want to use for the Exercise, Save the illustrator file to a folder:
lastname_e3
Save the illustrator file:
lastname_e3.ai
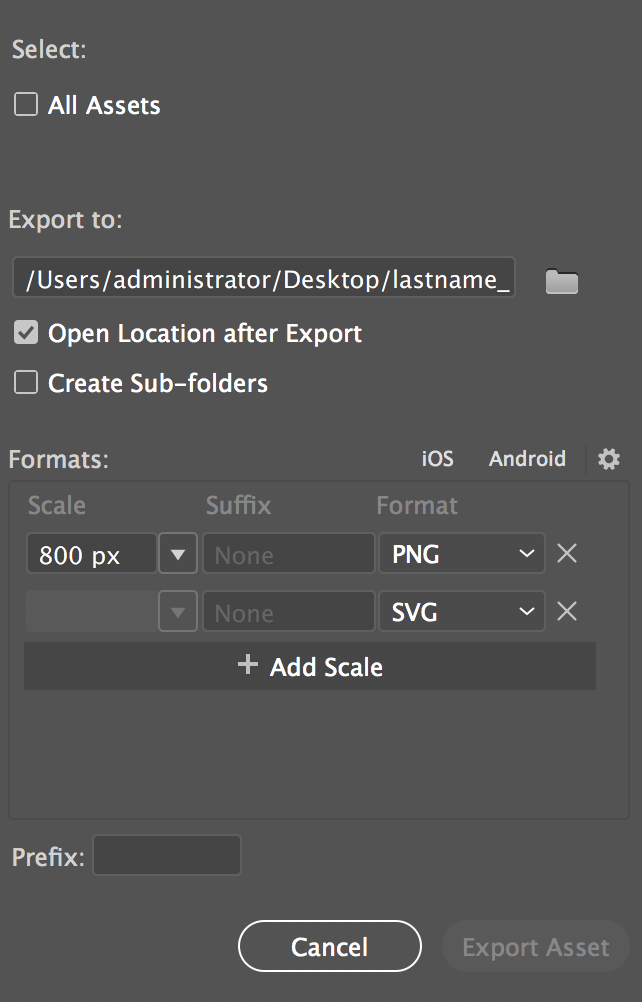
And then Select across your object, Right-Click, Export Selected
PNG, the Size will be Width: 800px
Add a Scale
Change the 2nd line from PNG to SVG
You are ready to hit the Export Asset button.
Rename in the e3 folder both the png and svg from "assets" to your lastname_e3