PolyScape Tutorial
Find 4 Landscape images (Download from UnSplash, or use your own Landscape images)
These should contrast from each other in either color (cool / warm) or context (urban / nature)
New Image ⌘n
2550px width 2550px height
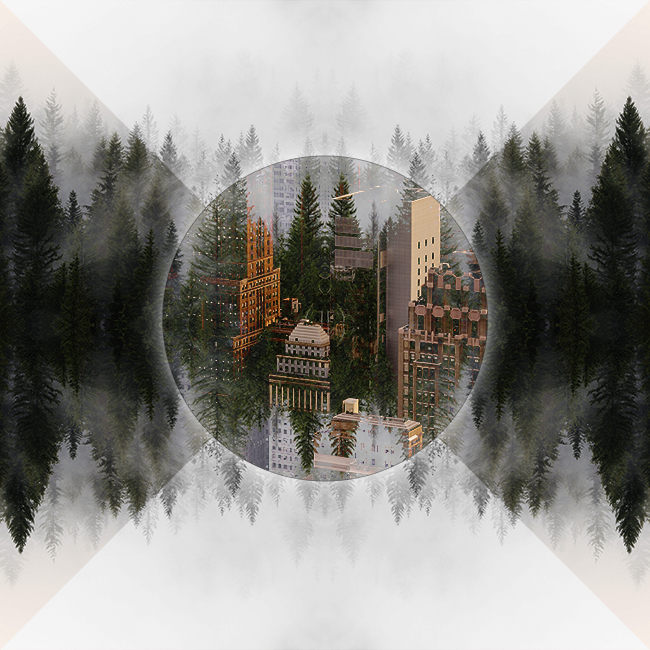
One Shape, Mirrored Landscape:
- To create a more complex composition, one landscape layer can be manipulated with Transform Flip.
- Open a landscape image, set the crop tool to 1275px width & height, 72 res (delete cropped pixels).
- Crop a portion of the landscape.
- Make sure the Background layer is Unlocked.
- Move the new cropped layer to the 2550px sq image.
- Using the Move Tool, hold the Option key, click and drag (so that the image is in all corners of the image).
- Select the four layers and Merge ⌘e
- ⌘r to show rulers. Using the Move tool, pull out guides to the edges of the canvas and to the center (horizonal & vertical).
- Drag a Shape (using the Vector Shape Tool) - Fill with a Color (avoid a Stroke for now). Move the Shape so that it is centered.
- Drag and Drop the 2nd Landscape image to the Canvas.
- Clip the landscape image to the shape layer (using the clipping mask method - option click in between layers).
- You can then experiment with Layer Styles for the Shape layer.
- Experiement with Blend Modes
- You also can experiment with Adjustment Layers on either layers.
For more complex shapes:
- The first goal is to create a Black and White image that will be used as a template. You will create a "template" of shapes. The shapes will be filled with Black.
- Once the template is complete you will then load in at least 2 landscape images:
You can Turn visibility off, and load the layer with ⌘ click - The image placed on top will inherit the shapes. Load the shapes as selections and then either apply as a mask to the top landscape layer, or you can copy and then paste pieces from the landscape layer.
- At any point, any shape can be selected with either ⌘ click or by using a selection tool like the Quick Select or Magic Wand.
Using a Black & White image as a Template
- Create an image with 2 landscape images.
- Make sure that the image is an opaque Black & White image. Using Levels and increasing Black and White points in addition to contrast can achieve this.
- To Load the White areas as a Selection, Click on Channels. ⌘ click the RGB thumbnail. You should see Marching Ants - your selection is loaded.
- Click on the Top Layer image. Then click the Mask icon in the Layers Panel.
- You can then Invert the Mask with ⌘ i to get the opposite shapes to show through.
- OPTIONAL: Adjustment Layers using Clipping Masks, Blend Modes, and Layer Styles can all create effects that can push layers forward, backward or blend visually.