Animation
![]() Download the Animation Tutorials Files Zip
Download the Animation Tutorials Files Zip
In Photoshop, Menu Bar > Window > Timeline Panel
If you are working with an image that has never used the Timeline Panel nor has Animated, you will see a Button in the Panel that is both a Dropdown menu AND a Button to click on to commit to the selection.
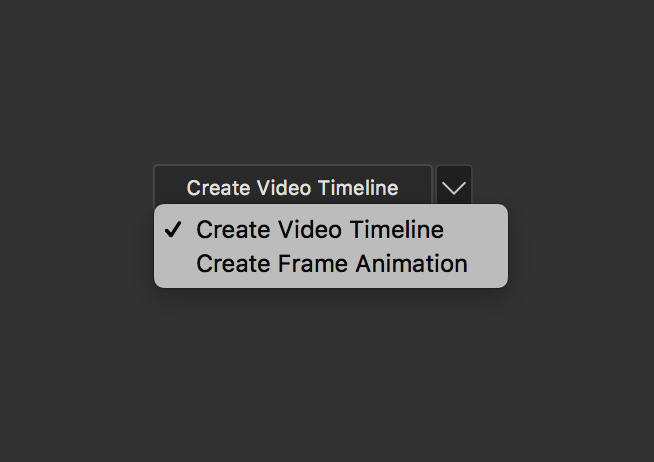
Otherwise, you can click between "Frame" and "Timeline" animation by clicking the icon in the bottom left corner of the panel:
![]()
![]()
Frame Animation
2-Frame
File to Open in Photoshop: 1-Thaumatrope.psd
- Choose Frame Animation.
- We will be creating a simple 2 Frame Animation. You will need at least 2 frames to produce any type of animation.
- Notice that there is 1 Frame. It is set to 5 sec.
Change the setting to 0 sec - Click the Paper icon to create a "new" frame.
- Notice how the 2nd Frame is the same as 1st. The Frames correspond directly to which layer is turned ON.
- While on the 2nd Frame, Turn the Visibility OFF on the top Layer "Layer 1".
- Make sure the animation is set to Loop (you should see the work "forever" in the panel next to the timeline icon in the lower-left corner. This is a dropdown for selecting how many times the animation will play. For all of the tutorials on this page, you will use a Looping option).
- Play the Animation - using the Triangle or "Play" option
- Save the PSD. All of the settings in the Timeline Panel will be saved when using the PSD format.
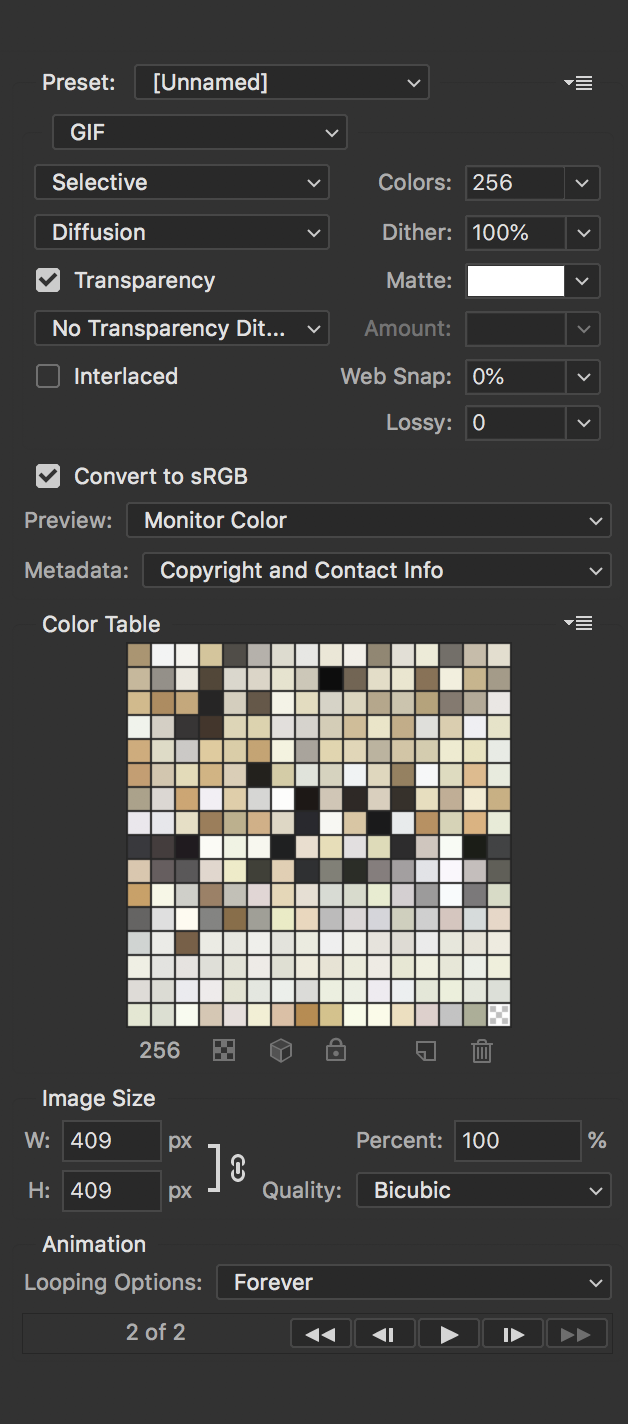
- Export the animation in a GIF format
I recommend using Export > Save for Web (Legacy)
Use these Settings and click the Save button
Position Tween
File to Open in Photoshop: 2-Position-Tween.psd

We will only animate the top layer "Hands". We will move this layer from frame to frame and use the Tween option to add frames inbetween so that the computer automates the movement. In Frame Animation, we can only Tween Position (Move), Opacity (in the Layers Panel), and Effects (Layer Styles)
![]()
- Use the Move Tool. Move the Hands layer all the way to the left so that it Snaps to the edge of the Canvas.
- Create a 2nd Frame (by clicking the Paper Icon)
- Move the Hands layer all the way to the right until it snaps
- On the new 2nd Frame, Click the Tween icon, a new window appears
- Choose: Tween with Previous Frame, Frames to Add = 6
- On the Last Frame, Click Tween again
- Choose: Tween with First Frame, Frames to Add = 2
*Tweening to First will Loop back to the First Frame - Test the Animation - click the Play Triangle Button
Notice how the animation is too smooth and doesn't have the feeling of a Tug-Of-War?
Change the First Frame timing setting to 0.5 Sec.
Test the animation again. - Save as PSD and Export for GIF
Style Tween
File to Open in Photoshop: 3-Style-Tween.psd

- Create a 2nd Frame
- On the 2nd Frame, Double-Click on the "Drop Shadow" on the Shape 1 Layer
- Change the Angle from 90 Degrees to NEGATIVE NINETY -90
- Tween: Tween with Previous, Frames to Add = 10
- On the Last Frame
Tween: Tween with First Frame, Frames to Add = 10 - There should be 22 frames total. Test the animation and the Dropshadow should rotate completely around
- Save as PSD and Export for GIF
Position & Opacity Tween
File to Open in Photoshop: 4-Position-Opacity.psd
- The First Frame will not change
- Create the 2nd Frame
- Move the Ball Layer down to meet the Shadow in the Canvas
(do not move the ball past the shadow, do not move the ball to either side of the shadow) - Increase the Shadow Layer Opacity setting from 25% to 100%
- Tween the 2nd Frame to the Previous, Add 4 Frames
- Create a New Frame: Turn OFF the Visibility on the Ball Layer, and Turn ON the "Ball-Squished" Layer
- Select Frames 2-6 (by clicking on one, holding shift, and clicking the last)
With the 4 Frames selected, hold the Option key, and drag past the very last frame in the panel and let go
There should now be a total of 12 frames. With the last 5 Frames still selected, click on the option drop-down for the panel in the top right corner. In the menu list, find "Reverse Frames". - Play the animation. Test to see which frames should display for more time than others. Make adjustments.
- Save as PSD and Export for GIF
Automation
File to Find in Bridge: Folder > 2-Film-Stills
- In Bridge, Select all files in the "Film Stills" folder >
Menu Bar > Tools > Photoshop > Load Files into Photoshop Layers - Make sure the size of your image is small enough to use to animate in Photoshop
Menu Bar > Image Size > *Do Not exceed 800px for either Width or Height (my recommendation) - In the Menu for the Timeline, Top-Right Corner: Create Animation from Layers
- In the Menu for the Timeline, Top-Right Corner: Select All Frames
- In the Menu for the Timeline, Top-Right Corner: Reverse Frames
- Save as PSD (choose a location) and Export for GIF
*if you are doing this on your own, and you've been shooting on your camera using Stop Motion techniques, your image size might be much too large to use to animate in Photoshop (it could crash the software).
Make sure your image size has been reduced before attempting to Animate or Export (use Image Size)
Also, if you are working with Stop-Motion, prior to Selecting and Importing Files as Layers, I recommend Renaming through Menu Bar > Tools. Use the "Text" option, Give the Name something useful and end the name with an UnderScore, then use a 3 digit number after that.
If you are working with more than 20 files, I recommend also changing the size of all the files in Bridge using Menu Bar > Tools > Photoshop > Image Processor (use the PSD option to avoid adding compression) and change the Width and Height to 800px. This will save your files into a Sub-Folder called "PSD" and they will all be resized. You can then Select All, Menu Bar > Tools > Photoshop > Load Files into Photoshop Layers
Timeline Panel
*The Timeline panel is designed to animate and work with Video / Sound. The following tutorials only deal with animating Photoshop Layers.
The Timeline will show you a Default of 5 Seconds. This can be Trimmed or Extended. The time is also described as Frame Per Second. There are 30 fps. So, half of a second is 15 frames.
So, if there are 30 frames a second and there are 5 seconds, we have a total of 150 frames.
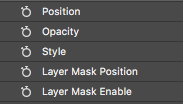
Timeline uses Tween as well, but we have to first choose where we want the Keyframe to be positioned by first placing the PlayHead where we want it in the actual timeline, and then clicking on one of the Stop Watches next to what we want to Tween. Position, Opacity, Style, etc. Tweening doesn't extend the number of frames. We will still have 150 frames.
Keyframes: This is a Frame where something specific happens. We can then Tween between the Keyframes.
The Tween will be dependent on where the Keyframe has been defined and how it is relative to the next Keyframe.
Position
File to Find in Bridge: Folder > 3-Timeline-Animation >> 1-position.psd
- We are using the Video Timeline option for the following animations.
- To keep things simple, Let's practice Trimming the Timeline so that there is only 4 Seconds.
At the Top and to the Right, locate a grey slider and drag it to the 4:00 mark.
Next, drag each of the 2 Tracks - they are purple. Drag so that it snaps to the 4:00 mark. - Find the Playhead (It's blue and has a red line extending down) and Place it at the beginning of the timeline
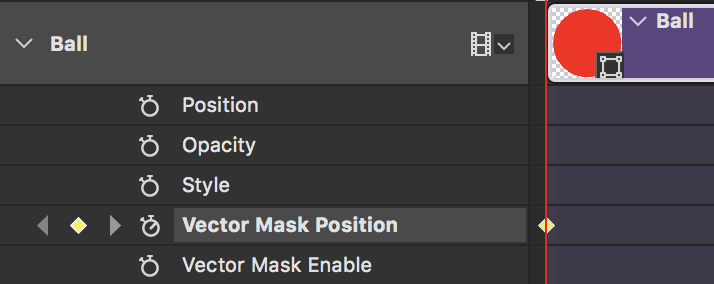
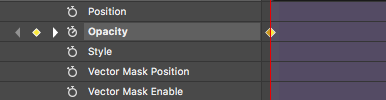
- We will be animating the Ball. The Ball is a color fill layer that uses a Vector Mask to produce its shape. Because of this, we cannot animate the "position" (which is only for Raster objects) but instead, we will animate the Vector Mask
- Click the Stopwatch icon for the Vector Mask Position. A yellow diamond has now appeared. This is a Keyframe.
- Move the PlayHead to the 1:00 second mark. Next use the Move tool and drag the Ball down. This will create a 2nd Keyframe.
- Move the PlayHead to the 2:00 second mark. Next use the Move tool and drag the Ball down. This will create a 3nd Keyframe.
- Move the PlayHead to the 3:00 second mark. Next use the Move tool and drag the Ball down. This will create a 4nd Keyframe.
- Move the PlayHead to the 4:00 second mark. Next use the Move tool and drag the Ball close to where the animation began. This will create the last Keyframe and the illusion of a Loop.
- Make sure the Playback is set to Loop (find this option under the Gear icon in the top left corner of the panel).
- You can move the Keyframes around in the timeline. The closer they are together, the faster the action will occur. The further away, the slower. Experiment with the Speed of the action.
- Move and Place the Playhead on the Timeline and add another Keyframe by then Moving the Ball.
Readjust the Keyframes. - Save as PSD and Export as GIF
Opacity
File to Find in Bridge: Folder > 3-Timeline-Animation >> 2-opacity.psd
- We will stick to the 5 Second default (if it is not 5:00, you can drag out the tracks to that mark)
- Place the Playhead at 0:00
- In the Layers panel, the Opacity for the Skirt layer should be 100% and the Opacity for the Pants layer should be 0%
- Click On the Opacity Keyframing (by clicking the Stopwatch) for both Layers "Skirt" and "Pants"
- Reposition the Playhead to the middle of the Timeline. This should be 2:15 (that is 2 seconds, 15 frames)
- Change the Opacity for each layer to swap for 0% and 100%
- Move the Playhead and position at the End of the Timeline. Boost the Skirt layer back to 100% and reduce the Pants layer back to 0%. This will then give the appearance of a Loop.
- Experiement now by moving the middle Keyframes for each layer so their fades do not occur exactly at the same point. Keep the start and end Keyframes in place (do not move them).
- You can also experiment with adding more keyframes if you want the images to remain on the screen longer.
- Save as PSD and Export as GIF
Layerstyle
File to Find in Bridge: Folder > 3-Timeline-Animation >> 3-layerstyle.psd

- Find the "filament" layer and open the options in the Timeline panel
- Position the Playhead at the beginning 0:00 mark
- Click the Stopwatch for Style
- Position the Playhead at the 0:20 mark (20 frames)
- Double-Click the Out Glow layer style in the filament layer
- Change the Spread to 100%, and Size to 95 px
- Reposition the Playhead to the 2:00 mark (2 second)
- Double-Click the Out Glow layer style in the filament layer
Change the Spread to 95%, and Size to 90 px - Reposition the Playhead to the 2:25 mark (2 second 25 frames)
- Double-Click the Out Glow layer style in the filament layer
Change the Spread to 18%, and Size to 35 px
(which are the same settings for the 1st keyframe) - Experiment with your own settings, keyframes, keyframe positions
- Save as PSD and Export as GIF
Transform - Rotate
File to Find in Bridge: Folder > 3-Timeline-Animation >> 4-rotate.psd
- This one is more tricky. First, Set up your file so that there is a clear middle point. You also might want to turn on the "anchor" also called the "reference point" for Transform in the Preferences menu: ⌘ K and click on Tools: "Show Reference Point When Using Transform"
Your image should be sized, transformed and cropped so that there is a clear middle. It would also help greatly if the image was a perfect Square. To do this, you can use a 1:1 contrained Crop. Delete Cropped Pixels. - Convert the layer you intend to rotate to a Smart Object (cntrl click on the layer, and find "Smart Object" in the list).
- In the Timeline Panel, find the reference to the layer you want to rotate. Expand the layer so that you see the Stopwatch icons. Position your Playhead.
- Click the Stopwatch for Transform to create your initial Keyframe.
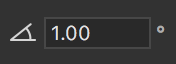
- Without moving the Playhead, use ⌘ T and rotate slightly clock-wise. I use the Tranform Angle option in the Option Bar. For the first transform, I recommend 1.00
- The Timeline might be very short. Extend each purple track to the 2:00 mark.
If you are too zoomed in, this may be difficult. Use the "mountain" icons to zoom out and then extend the tracks. - Move the Playhead to the middle of the Timeline 1:00
- Transform and rotate for an angle of 178.00 (type that in to be precise).
- Move the Playhead slightly further to about Timeline 1:01
- Transform and rotate for an angle of -178.00 (just type that in to be precise).
- Position the Playhead to the end. Transform and type in the Angle field -1.00
- If your numbers are off, the rotation might not spin correctly. It might only spin clock-wise for half the time and then spin back up counter-clock-wise.
If it doesn't work, you will need to do it again by Clicking OFF the Stopwatch (which will remove Keyframes) and then Position the Playhead back at 0:00, Click the Transform Stopwatch On again and repeat this tutorial section.
OR click in your History to go back to when you extended your tracks - You are finished when the image rotates continuously.
- Save as PSD and Export as GIF
Try On Your Own
- Use the file "4-Position-Opacity.psd" (in the "1-Frame-Animation" folder)
- See if you can create the same animated effect that we learned in Filmstrip mode But do it in Timeline
- You will need to Delete the Animation first in the Panel Menu list.
- Then switch to the Timeline interface by clicking the icon in the bottom-left corner