Exercise 3 / Portrait Composite
This assignment will be turned into the Dropbox.
You will find and download images from the internet.
You will find 2 color photographic portrait images of celebrities.
Make sure that the images are frontal, cropped to the face, and not tilted.
Use a Stylus and Tablet.
Directions:
Search the internet - Google Image Search:
- Search for a portrait of 2 celebrities. (you can also refine the search for "head shot" or "photo")
Use the Advanced Search option, "usage rights: free to share or modify" - Find an image that is more than 600px in the height. (no drawings! only color photos)
- Make sure that the face is straight forward, not tilted, and that there is no cropping (specifically any part of the face or hair).
- Save images to the Photo HD > Lastname_192. (Create an folder "lastname_e2, then a sub-folder named "assets". Place images that you intend to use in the assets folder. Edited psd files will be saved in the root location - I'll explain this in class)
Open in Photoshop:
- From Bridge, Select both images, Menu Bar > Tools > Photoshop > Open as Layers
- SAVE this new image into a folder on Photo HD: lastname_e3, lastname_e3.psd
- Double-click each layer and name them as per the celebrity
- Make sure that the dominant face is the bottom layer
- On the top layer, lower the opacity to about 50% so you can see both at the same time.
- Use a Free Transform tool (cmd t) and drag and resize the top layer so that the eyes are matching the bottom layer. (at least the eyes, try to match up as many features as you can)
- Bring the opacity setting back to 100%
- Apply a mask to the top layer. Invert the mask (use cmd i, or use the panel for the mask)
- Use your brush tool (b), soft the edges, lower the opacity in the options panel,
paint with white to bring in the layer, paint with black to remove the visability of the layer. - *If you want to see exactly where you have been painting, hold the option key and click the mask.
If you want to see a visual guide while you are painting, click the \ key. This will bring up a red color. - Your 2 portrait images might vary in terms of contrast and color saturation. Apply a "Curves" and/or a "Hue/Saturation" adjustment layer to one of your layers so that both layers match.
When you have successfully masked so that both faces seem merged as one image,
you are ready to SAVE and start on ONE MORE composite using 2 new faces of different celebrities.
Back-Up
Always make back-ups to your Server Account AND to your Removable Media (USB drive)
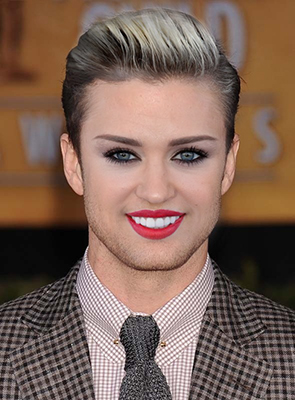
Use these Martin Shoeller images
Turn in to the Dropbox on the Server:
folder:
lastname_e3
image:
lastname_e3-1.psd
lastname_e3-2.psd
sub-folder:
assets
(place all original files that you use in this folder)