Workshop 3-1
Complete the in-class Workshop
Steps of this Workshop:
- Combine 2 image files into Photoshop Layers
- Move and Transform to match layer position
- Add a Layer Mask and blend between two layers
- Add an Adjustment Layer and match tone and color
- Add a "stamp visible" layer at the top of your layer order (shift, option, cmd, e)
Using clone and healing tools on this layer until the image is ready for output
Rename layer: stamp - Resize/Resample image for a width of 800px (height will constrain, use 72 dpi)
- Crop the image destructively (make sure there is no pixel information existing outside of the canvas area)
- Click on the top layer, Select All
Add a Solid Color Adjustment layer > Gray or #808080 > lower the Fill to 0%
Add a Layer Style > Stroke > 3px, black, on the inside - Increase Canvas: 0.5 inches on all 4 sides
- Add a White Solid Color Adjustment Layer, Move it to the bottom layer position
- Using the Crop Tool, pull down the crop area so that you increase your canvas size on the bottom only
(you will need to use your own judgement on how much to increase) - Add Text using your Type Tool - you choose font face, size and color
(This will be a title for your new face, something like "Bragelina". Be creative!) - Add an effect to your text. This can be a layer style or a filter. If you use a filter you will need to Rasterize or convert your type layer to pixels before a filter can be applied.
- Save AS: workshop3-1.psd
- Save AS: workshop3-1.jpg
///////////////////////////////////////////////////////////////////////////////////////////////////////////////////////////////////////////////////////////////////////////////
As you are working, keep a back-up on your USB
When you are completely finished, drop folder into the Turn-In folder on the Shared Server in the classroom.
Place all images in a folder:
lastname_workshop3-1
images:
workshop3-1.psd
workshop3-1.jpg
assets: (folder)
include the 2 source images used
///////////////////////////////////////////////////////////////////////////////////////////////////////////////////////////////////////////////////////////////////////////////
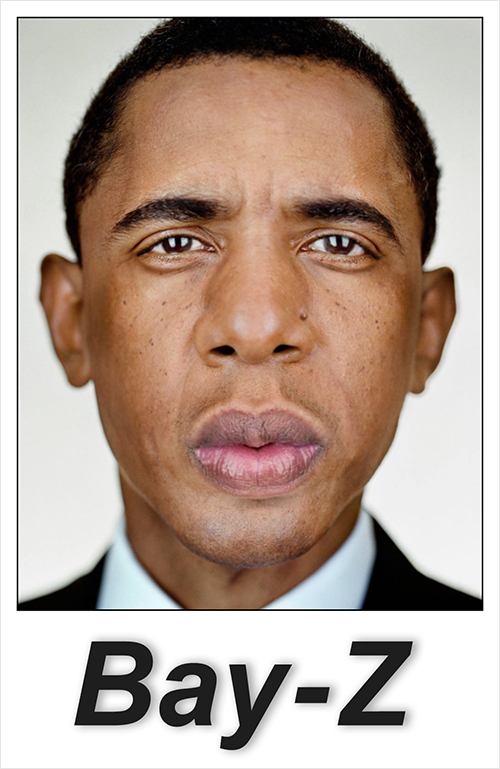
Image Example from Workshop: